How to create a discord.py Bot on Replit?How to create a discord.py Bot on Replit?
How to code a discord bot in Python with discord.py on Replit?
Replit allows you to host your bot for free without having to install anything.
In this tutorial, you will learn how to code discord bots in Python. We will see how to make a bot that responds to multiple commands.
Before that, we will see how to declare it on the discord developer portal.
And then we will see how to configure everything you need to get started.
You don’t need a high level of Python to follow this tutorial. If you want to learn Python, I have an article to learn Python.
In this course, we will use Replit which is a site that allows you to code in the cloud.
Replit is free, you don’t need a credit card to sign up, and you don’t have to install anything. Replit also allows hosting discord bots for free, so it will be useful for us to keep the discord bot running continuously.
Let’s start seeing how to code a discord bot in Python!
How to create a bot on the Discord Developer Portal?
Before coding a discord bot, you need to create an application on the Discord Developer Portal. This site serves as a control panel for discord applications and bots. Then, you need to define its intents and permissions before inviting the bot to a discord server.
Once on the site, click on New Application. In the popup that opens, give your bot a name, then check the box to accept the terms of use and press the Create button to create your bot.
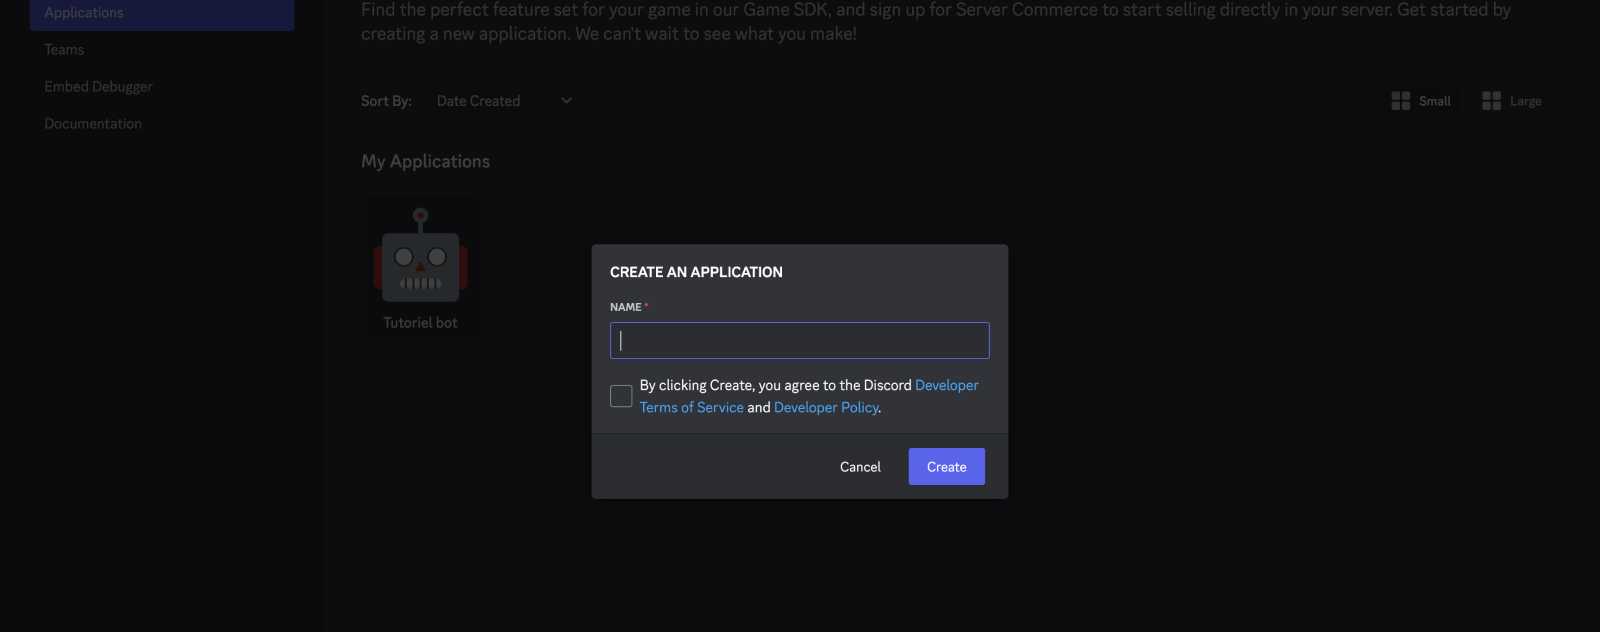
You will find yourself on a kind of control panel for your bot.
On this page, which includes all the information about your bot, you can provide it with an image that will serve as your bot’s avatar on your discord.
You can also write a description for it and add tags to configure your bot on this page.
What are the intents of a discord bot?
Next, go to the bot page by clicking on the link in the left menu.
This is where we will define the intents.
Intents are WebSockets that listen to several types of events for a Discord application like a bot. There are 3 types of intents: “presence”, “server members”, and “message content”. To follow best practices, it is advised to activate only the necessary intents.
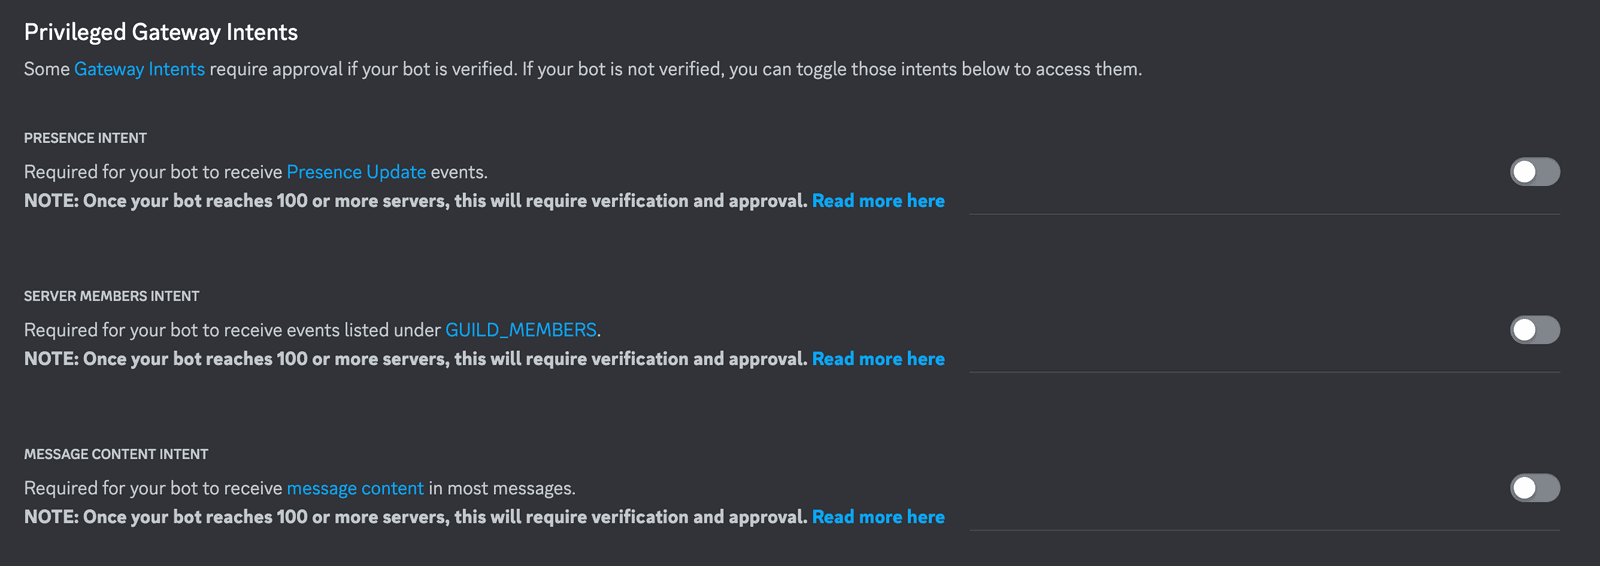
The different intents of a discord bot:
- Presence intent is the intent that allows receiving the statuses of a Discord server.
- Server members intent allows seeing events related to members on a discord server
- Message content intent allows listening to events related to messages on a discord server
For the bot I am making in this tutorial, I will just send messages with commands so I just need to check the intent for messages.
You can check the other two intents if you want to go further with your bot.
And you can always come back to this page and change its intents if you change your mind in the future.
How to define the permissions of a discord bot?
Now that we have the intents, we will create a link to invite the bot to your server.
Go to OAuth2 and then click on “Bot” to allow your application to be a bot.
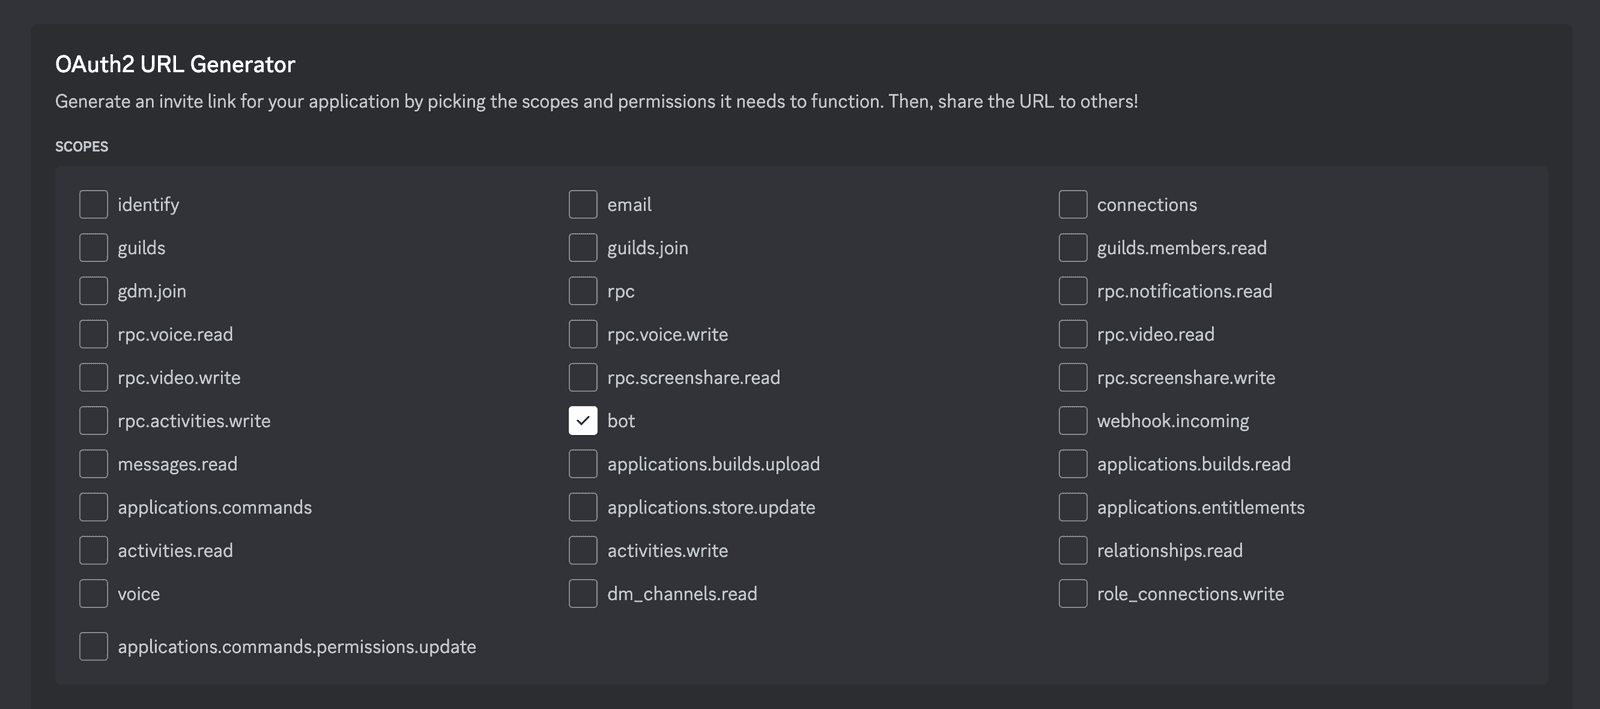
And there a new section appears. In it, you can choose the permissions for your bot.
I will just choose “Send messages”.
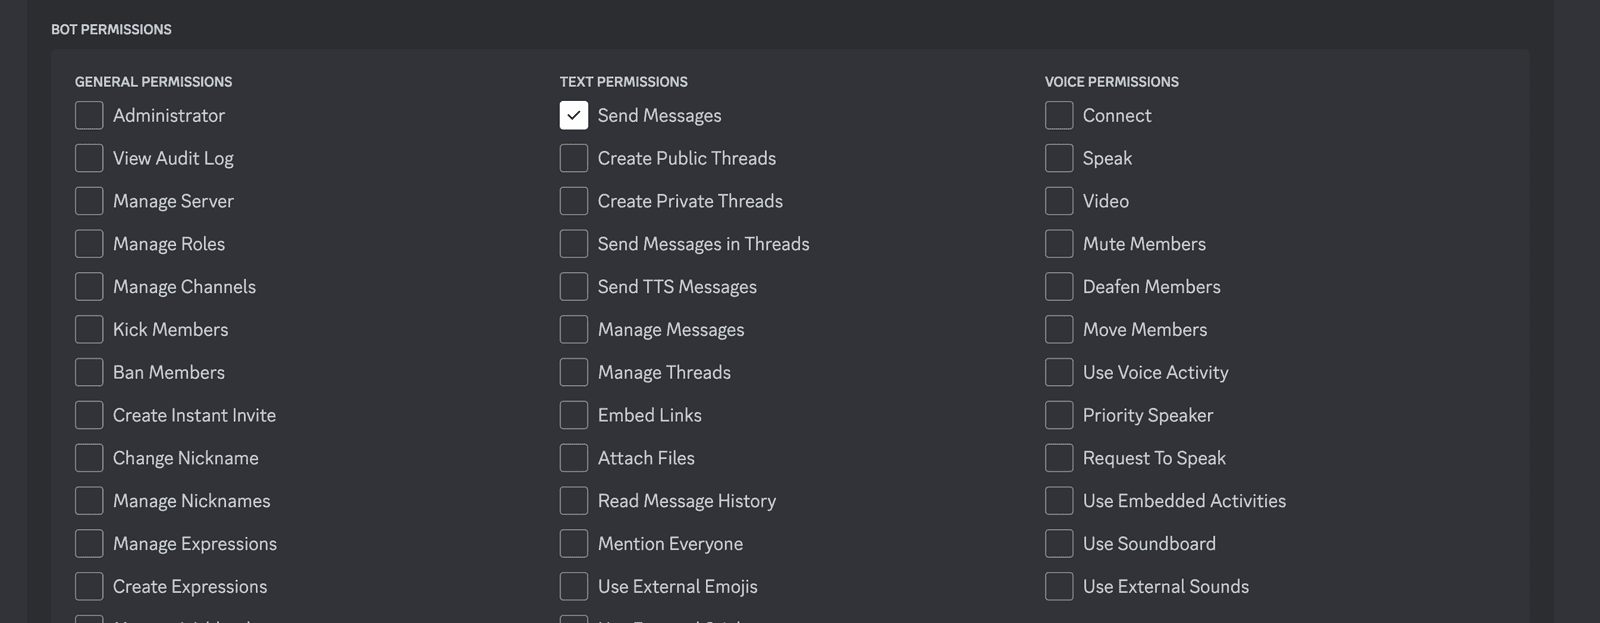
And at the bottom of the page, you have a URL that has been generated based on the permissions you have chosen.

This URL serves as an invitation link for your bot on your discord server.
Copy it and then paste it into your browser.
And there you find yourself on a page that asks you on which server you want to install your bot.
💡 You can only add a discord bot to a server on which you have permissions.
Choose the server on which you want to invite your discord bot and press Continue.
Then we see what permissions the bot will have, if it’s okay press the Authorize button to validate.
And if everything went well you should see a page that tells you that your bot has been successfully added to your server 🎉
Press the button to go to your discord server.
Once on your server, you will see a new member, your discord bot, but there is a problem… it is offline.
To bring it online we must execute the bot’s code and that’s what we’re going to do with Replit!
How to code a Discord Bot on Replit?
Replit is a site that allows you to code directly from your browser. You can use it for free by visiting replit.com.
Once on the site, create an account or log in if you already have an account.
And then you will arrive on the main page of replit.
Press the button to Create a repl.
Choose Python and you can also give your project a name, finally press the Create button to create your repl.
You find yourself on a page to write code that looks like an IDE.
Let’s look at the interface together.
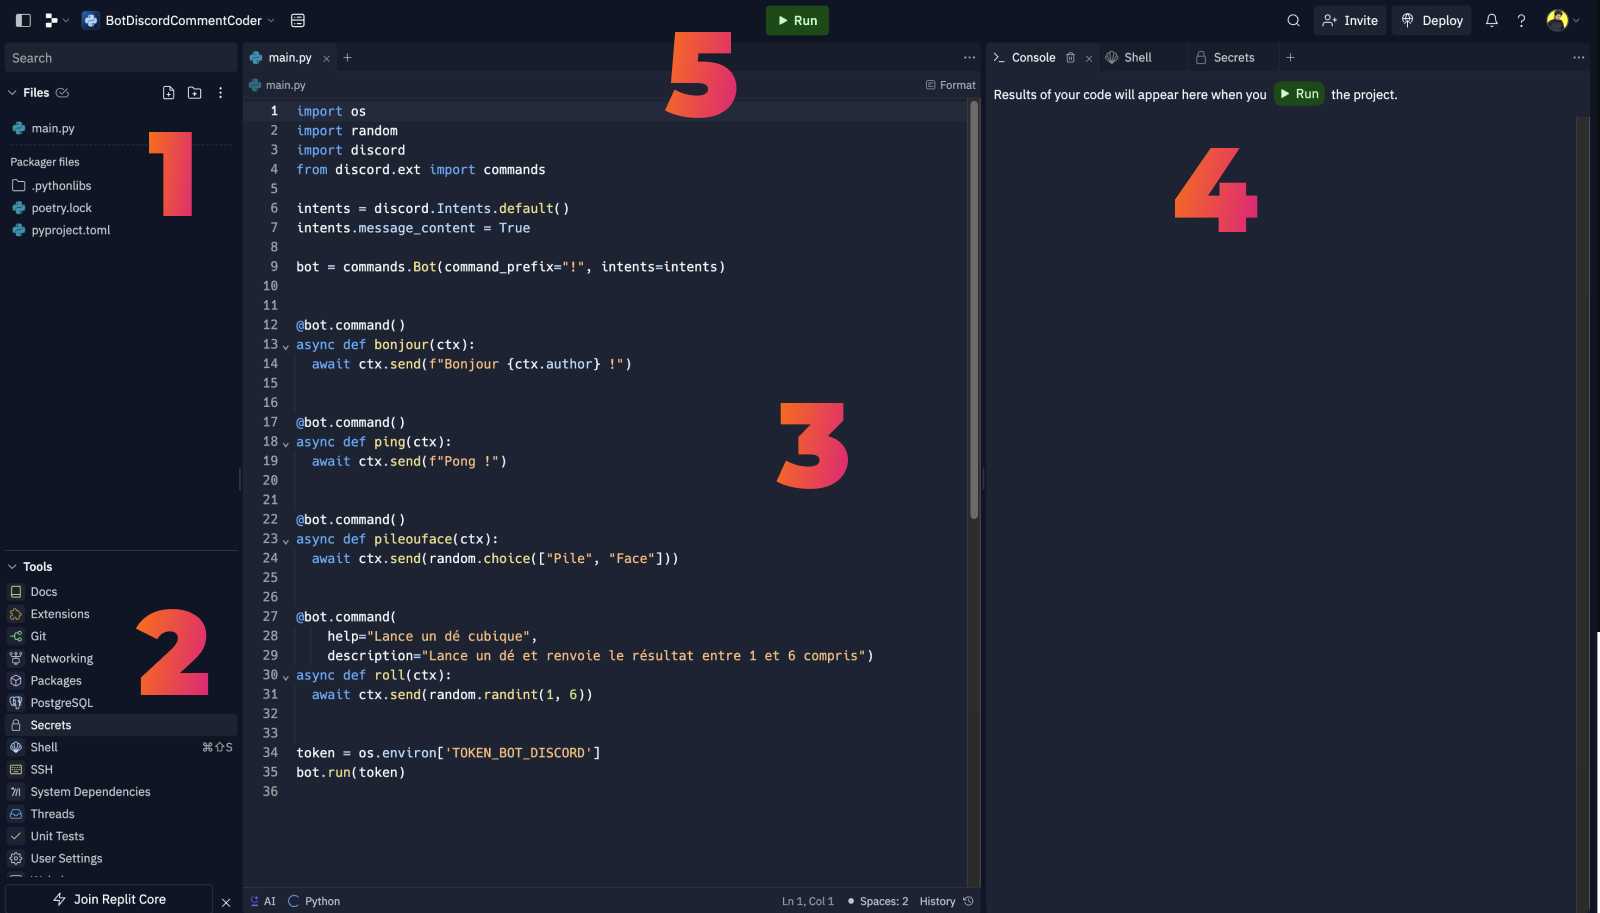
In the top left you have your files. (1)
In the bottom left, there are Replit features (2), one of which we will use shortly.
And then, in the central part, there is half for writing code (3) and another part with console and shell tabs (4).
And finally, there is the run button that will allow us to launch the bot (5).
Before we can start coding your Discord bot, we need to retrieve one last thing from the Discord Developer Portal, your bot’s token.
Go to the Bot section and press the Reset token button.
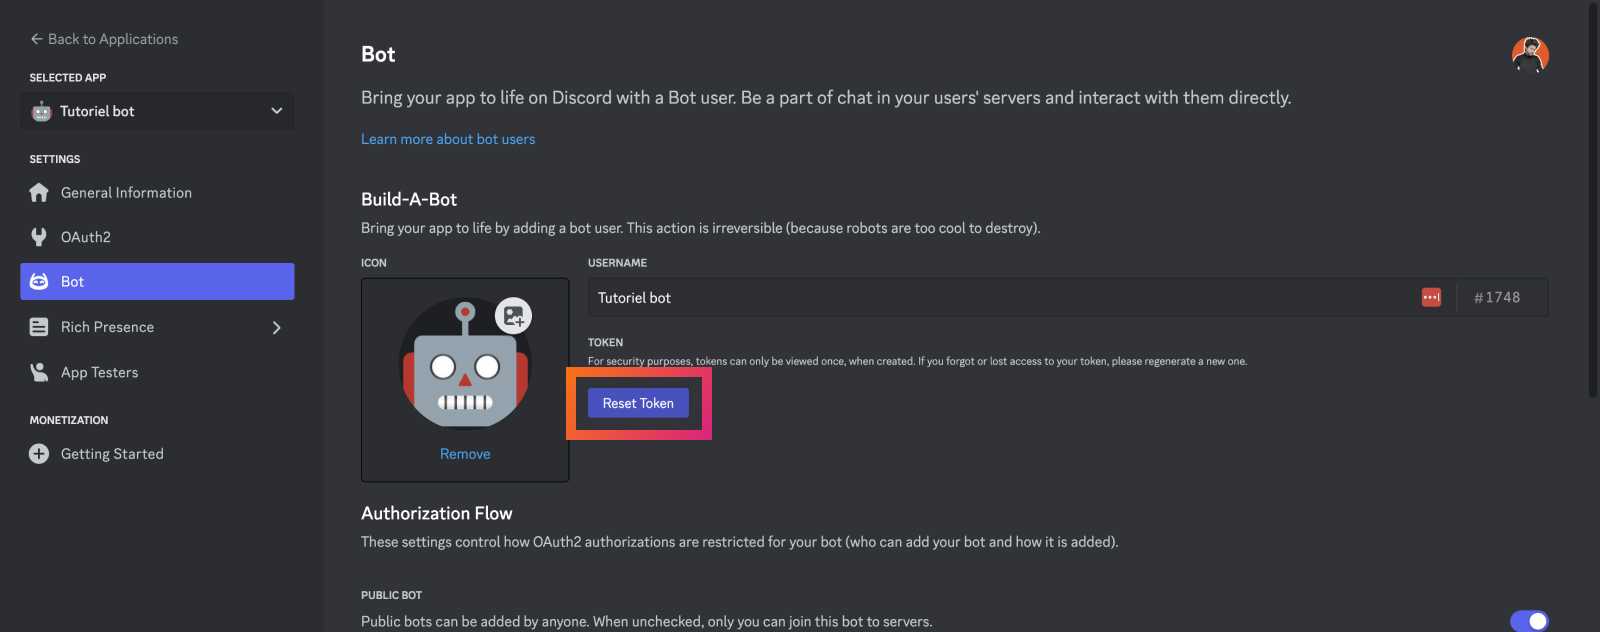
You should see a long string of characters; that is your token.
⚠️ A token is like a private key or a super password; it’s a hash that gives direct access to your bot. Therefore, DO NOT share it, nor push it on GitHub or publicly.
Copy it and then return to Replit.
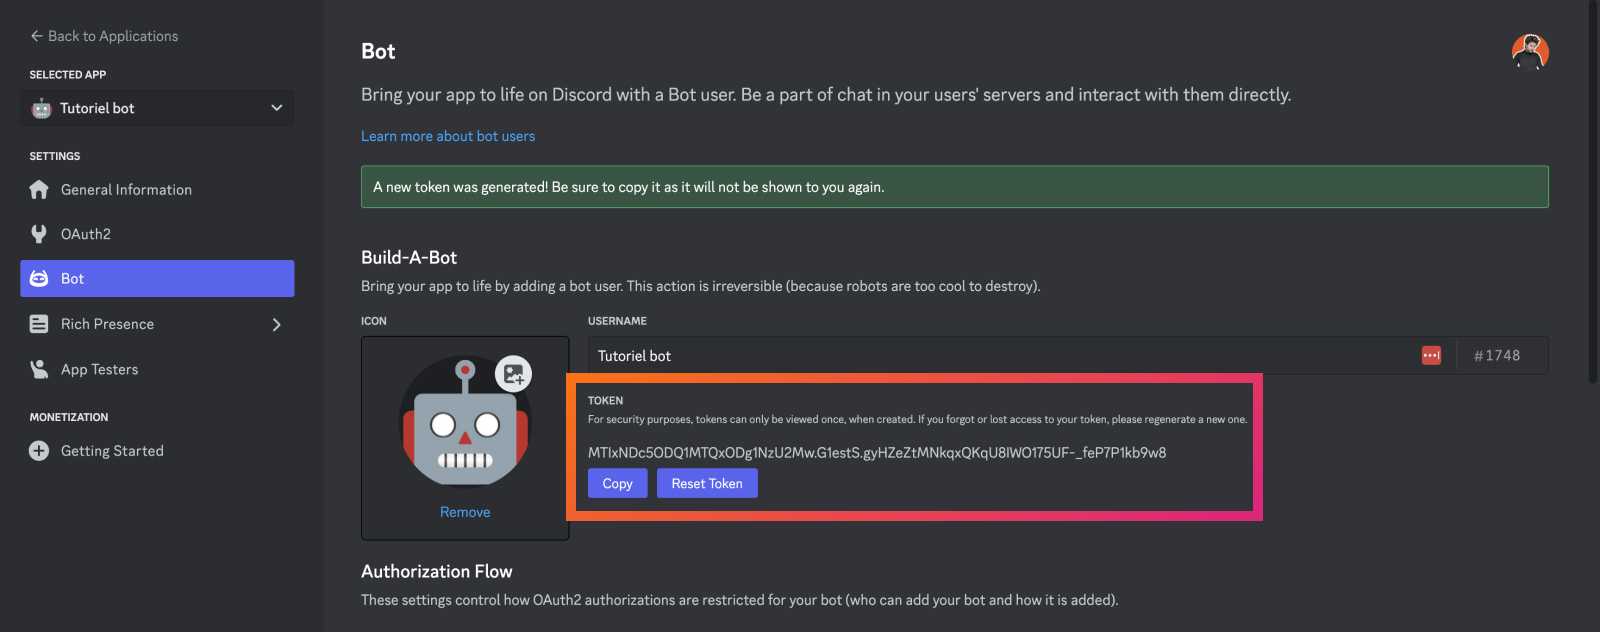
Replit’s free plan makes all your code public, but you can still save secret data without having to pay by using one of the tools in the bottom left of the Replit interface.
You cannot paste the token in the code as your audience.
So click on the “Secrets” tool, and in the right part of the interface, press New Secret.
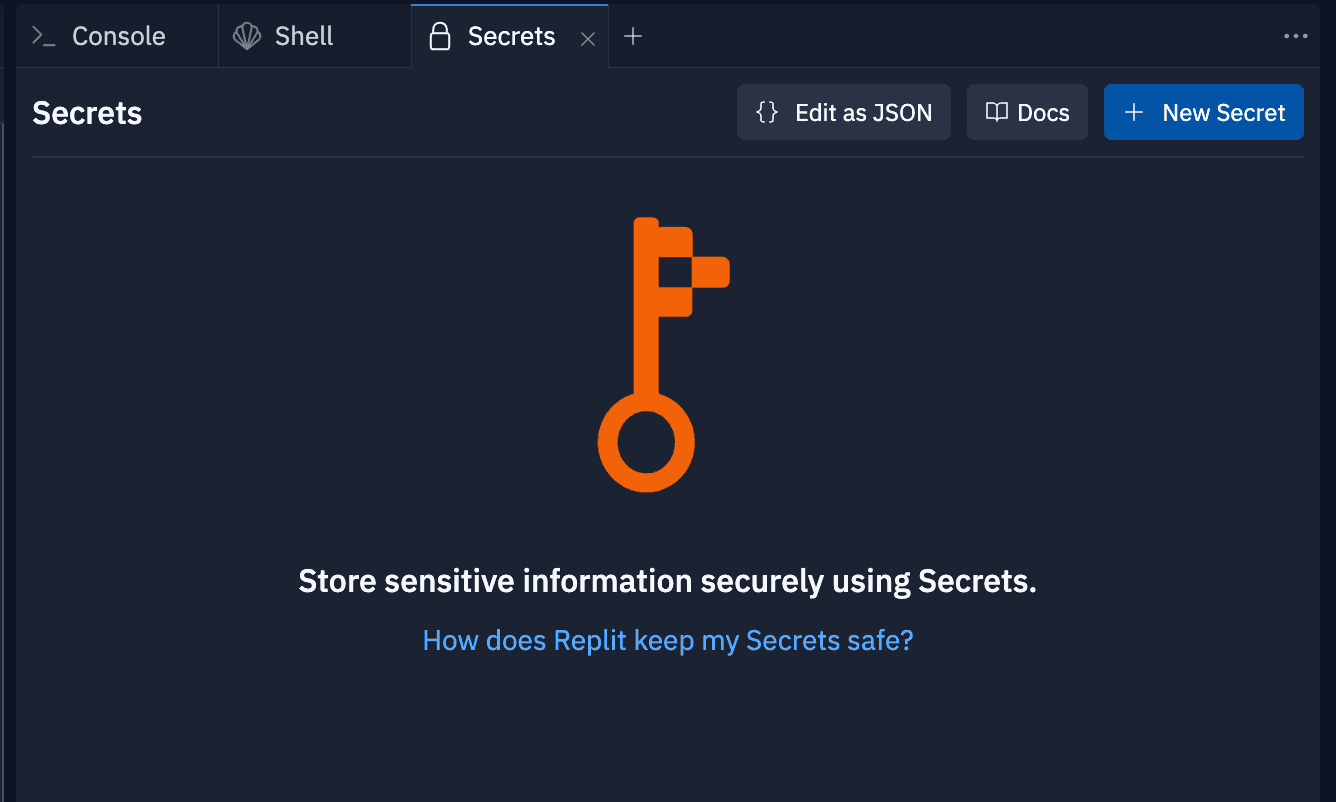
In the Key, key, SECRET_KEY, choose a name for your secret like TOKEN_BOT_DISCORD for example.
In the Value field, paste your token that you retrieved from the Discord Developer Portal.
Replit gives you two lines of code that you can add to your main.py file in which we will code the Discord bot.
And I’m just going to change the variable name my_secret to token.
We finally have everything we need to code the bot 🤖!
How to code a bot with discord.py?
So, let’s start by importing the Python module for Discord bots, called discord.py.
import discordWe will also need the extension from discord.py to create commands.
import discord
from discord.ext import commands
Another advantage of Replit is that it will automatically install the Python modules we import.
So, there’s no need to manually install anything.
Let’s continue by first declaring our bot.
We must pass it a symbol that will precede our commands in command_prefix; you can use the exclamation mark.
And then, if you remember the intents you declared on the Discord Developer Portal, you must set them here as well.
I just had the intent for messages, so I will create an intents variable that takes the default intents and then add the intent for messages.
intents = discord.Intents.default()
intents.message_content = True

bot = commands.Bot(command_prefix="!", intents=intents)
Before continuing to write commands, let’s try to launch the bot to see if everything works well, so at the bottom of your file, do bot.run and pass it your token.
bot.run(token)At this point, you should have code that looks like this:
import os
import discord
from discord.ext import commands

intents = discord.Intents.default()
intents.message_content = True

bot = commands.Bot(command_prefix="!", intents=intents)

# We will code the commands here

token = os.environ['TOKEN_BOT_DISCORD']
bot.run(token)
Press the run button, and since it’s the first time, Replit must install discord.py and the rest. It will take a few seconds, but it will be much faster the next times you launch it.
To see if it worked, go to your Discord server, and your bot should be online!
💥 Otherwise, return to Replit and check the error message in the console and fix it.
We can create our first “hello” function that responds hello when we type an exclamation point hello on Discord.
For this, create a hello function with def hello, and this function receives a parameter context which we will call ctx.
def hello(ctx):For Discord to understand that it’s a command, we must use a decorator, or rather a function that returns a decorator, so before your function by adding @bot.command()
@bot.command()
def hello(ctx):
Also, our function will be asynchronous, which will allow the bot to do several things at the same time using coroutine with the await keyword.
@bot.command()
async def hello(ctx):
So let’s redo our function, which will just be a line of code that will respond hello on Discord, and we can do this with the context’s send function await:
@bot.command()
async def hello(ctx):
  await ctx.send("Hello!")
We will also receive the author of the message, which is also in the context, by turning our string into an f-string and adding ctx.author in curly brackets.
@bot.command()
async def hello(ctx):
  await ctx.send(f"Hello {ctx.author}!")
Do stop and then run to relaunch the bot, and then go to Discord and test the exclamation point hello command.
If you have followed the code correctly, your bot should greet you and then your username.
Congratulations! You have your first working command!
From now on, you can create other commands and add complexity to make games, a moderation system, and much more. There are really no limits to what you can do!
But let’s continue by making other commands; I will make a ping function that responds pong.
@bot.command()
async def ping(ctx):
  await ctx.send(f"Pong!")
Similarly, for a headsortails function that will randomly respond heads or tails thanks to Python’s random module with (random.choice(['heads', 'tails'])).
@bot.command()
async def headsortails(ctx):
  await ctx.send(random.choice(["Heads", "Tails"]))
For this to work, you must import random at the top of your file: import random.
And then we will make a roll command that rolls a die and returns a number from 1 to 6 with random.randint(1, 6).
@bot.command()
async def roll(ctx):
  await ctx.send(random.randint(1, 6))
So, you should have a main.py file that looks like this:
import os
import random
import discord
from discord.ext import commands

intents = discord.Intents.default()
intents.message_content = True

bot = commands.Bot(command_prefix="!", intents=intents)


@bot.command()
async def hello(ctx):
  await ctx.send(f"Hello {ctx.author}!")


@bot.command()
async def ping(ctx):
  await ctx.send(f"Pong!")


@bot.command()
async def headsortails(ctx):
  await ctx.send(random.choice(["Heads", "Tails"]))


@bot.command()
async def roll(ctx):
  await ctx.send(random.randint(1, 6))


token = os.environ['TOKEN_BOT_DISCORD']
bot.run(token)
Hey, I'm Thomas 👋 Here, you'll find articles about tech, and what I think about the world. I've been coding for 20+ years, built many projects including Startups. Check my About/Start here page to know more :).
